Shaking Off the Rust 1: Ray Tracing in One Weekend
Two classes stand out as my favorites from computer science at NCSU: x86 assembly, taught by Dana Lasher, and computer graphics, taught by Stuart Heinrich. In the graphics course, we wrote a rasterizer and a ray tracer (which I never finished 😅).
In the 16 years since, I’ve been working happily in web development, but I’ve started to lament losing touch with lower-level, near-metal (🤘) programming which captured my interest so much in college.
When I learned that my favorite CS lecturer, Dana Lasher, retired recently, I decided to start a fun side project in honor of him and the inspiration he gave me.
# Redemption?
But what to do? After some thought, there was only one choice: finish the ray tracer.
I dusted off my graphics projects from the class. To my surprise, despite being compiled on Linux Mint in 2009, the rasterizer binary still ran on Fedora 34 in 2021!
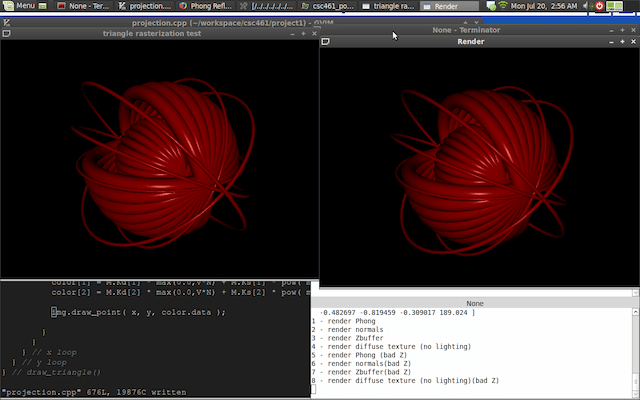

It looks like the program grew a few artifacts in the intervening 12 years. Bit rot, I guess. I’m just impressed that it ran at all, having been written on another distro, 12 years prior, by a complete novice at C++.
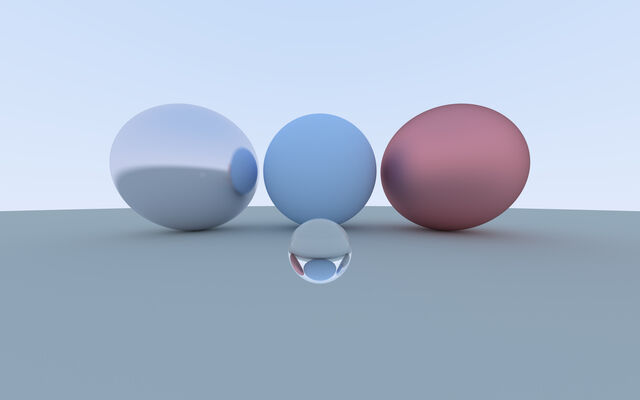
The ray tracer is another story. I didn’t even try running it again because what I did write was horribly inefficient. Here are some screenshots for evidence of my flailing on that project.


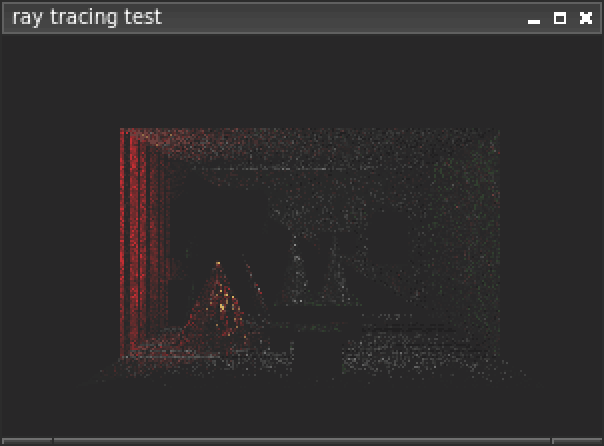
The final image above is a tiny 200x130 pixels, with spotty ray coverage, and took over 8 hours to render. That’s including required optimizations like a kd-tree for spatial filtering. Charitably, you could call the performance sub-optimal.
A Mysterious Update...
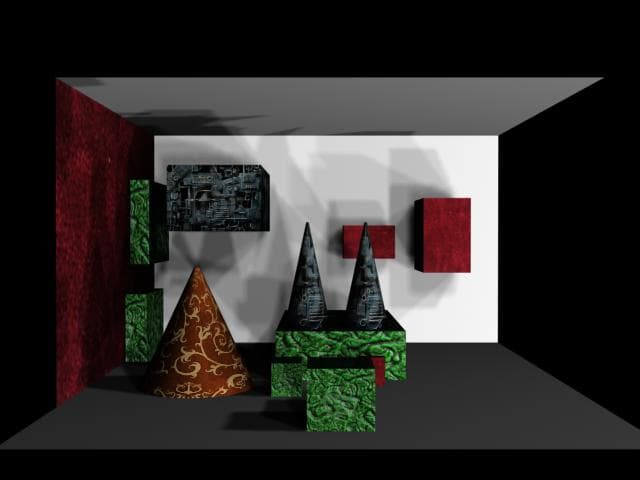
After publishing this post, I took a quick dig through some old emails and turned up something interesting. Evidently, after submitting the incomplete ray tracer shown above, I kept working on it, and to my surprise I actually, mostly finished it! In the end-of-semester chaos I must have forgotten to save many images, but here's a render I sent to the instructor.
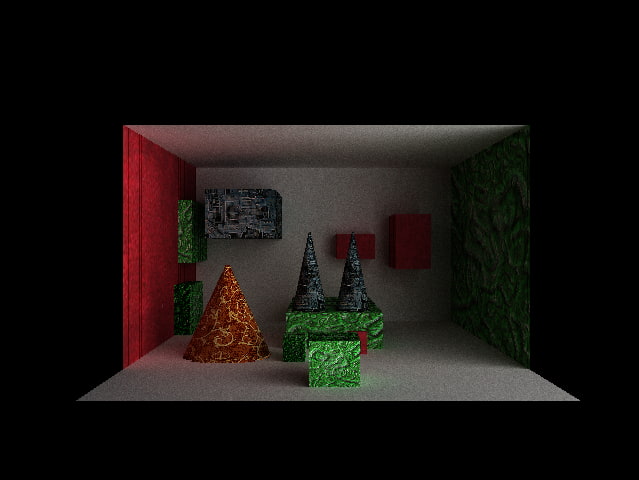
I have no memory of this place. And while it does have a few artifacts, it looks pretty good. This revelation does blow up the premise of this post; the project was already finished and there's nothing interesting about re-finishing it. Let's continue, undaunted.
I knew I wanted to start from scratch, since I wasn’t interested in revisiting C++. I picked Rust. I’d dabbled with it here and there, but never written anything more than a few dozen lines. It’s fast, fun, and has outstanding learning material. Perfect.
Next, I dug through my bookmarks for Ray Tracing in One Weekend, a guide by Peter Shirley on writing ray tracers. His example code is in C++, which was great as I really didn’t want to jot down someone else’s code. Porting is way more educational.
# The Colorful Parts
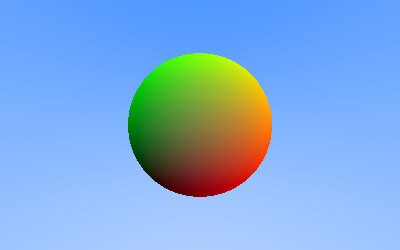
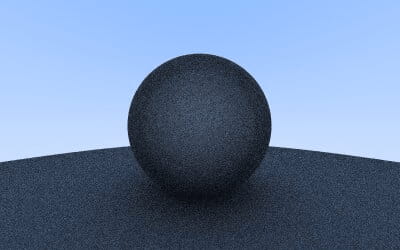
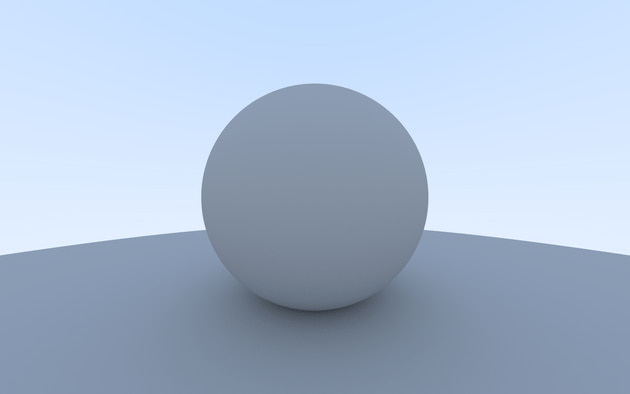
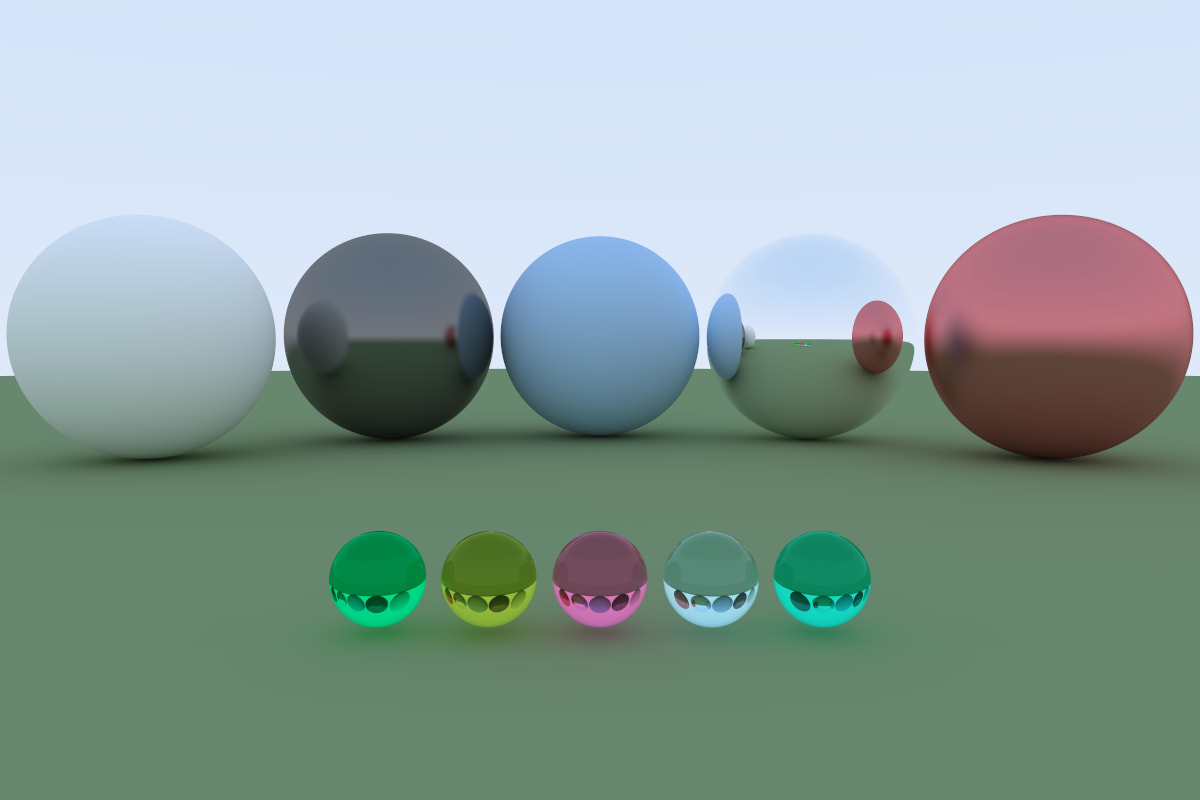
Long story short, I completed a Rust implementation of the first book of Peter Shirley’s series. The code is at rust-raytracer-weekend. The result is a ray tracer with a movable camera, sphere intersection, three materials (diffuse, reflective, and glass), anti-aliasing, and bokeh.
I learned a lot and had a blast, and it took way longer than one weekend. I call it: Ray Tracing in Eleven Weekends
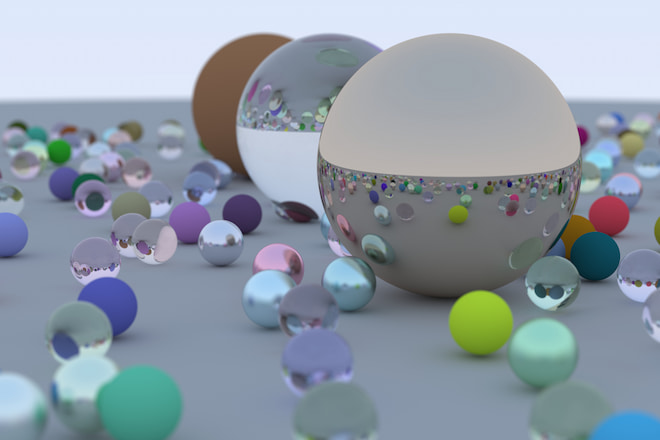
Here are some renders during development, showing the progress. These renders demonstrate how the book starts simple, and builds up.


# The Hard Parts
It wasn’t all candy colored pixels. I got tripped up by Rust’s module system, on the syntax for overloading arithmetic operators, and by the borrow checker countless times, but I think the most interesting challenge I had was with generic numbers.
# Programming with generic numbers
Writing functions for handling numeric types generically was a challenge I’d first encountered when dabbling in Rust with Project Euler. For example, if I wrote a function to test whether a number was prime, I might have it accept a u64, but then if I want to avoid casting, I need to make sure every number I may want to test for primality must also be u64, as must all other functions those numbers are passed to. That causes u64 to spread virally through the codebase.
To avoid that kind of type lock-in, I wanted to try Rust’s generics. I figured there must be a way to define a function that could accept, say, “any floating-point type”, or “any unsigned integer type”, regardless of precision.
I set about looking for generic number traits in the standard library and was surprised when I found none. What I did find is the num-traits crate, a collection of “Numeric traits for generic mathematics”.
While writing this post, I noticed the lead maintainer of num-traits is fellow Red Hatter Josh Stone! I reached out and thanked him for his work. I also asked if he thought generic numeric traits would ever get folded into the Rust standard library, where I’d first gone looking. He said:
“Fun fact, they came from the standard library, pre Rust 1.0.”
Apparently the traits had been pulled out of standard library in preparation for Rust 1.0 because the Rust devs weren’t ready to stabilize them yet. Josh has kept them stable since then.
He explained that stabilizing traits is tricky, because the rust compiler requires that all trait functions be implemented. Take this pretend trait, Fuzzy, which pertains to the fuzziness of animals. You can add functions with default implementations to Fuzzy all day long without causing any breaking changes for anyone using your trait.
trait Fuzzy {
  fn fuzziness(&self) -> u32 {
    10
  }
}
But this default implementation doesn’t make sense, because an animal’s fuzziness is individual. It really needs to be in an impl so it can be specific to the animal.
trait Fuzzy {
  fn fuzziness(&self) -> u32;
}

// meanwhile, in a user's codebase...

impl Fuzzy for Sheep {
}
Since there is no impl for the fuzziness function, the rust compiler emits the following error.
impl Fuzzy for Sheep {}
^^^^^^^^^^^^^^^^^^^^ missing `fuzziness` in implementation
And that’s why numeric traits don’t exist in the Rust standard library.
During this discussion it occurred to me that there could potentially be a name conflict between a function in a struct’s impl, and a trait function implemented for that struct. I asked Josh about this as well, and the discussion led to some docs on disambiguating function calls. He said that while there is some chance for name conflicts, it’s generally not considered a breaking change because of the low likelihood, whereas adding a trait function without a default impl is guaranteed to break the builds of your users.
# The Helpful Parts
This was a really fun project, and I could go on about what I learned for another hundred pages. I learned a lot, got stuck a lot, got familiar with the outstanding Rust resources on offer (especially The Book and Rustlings). I discovered Jon Gjengset’s truly excellent videos too late for this project, but I’m happily consuming them now. He’s a great educator.
This post was mostly about Rust, but the ray tracing side of the project was equally fun. I can’t recommend Ray Tracing in One Weekend highly enough, it’s a really accessible step-by-step guide through the principles of ray tracing. It is so exciting seeing something render for the first time.
And a special shout out to the Rust community at Red Hat for patiently fielding my questions even though I’m quite sure they had better things to do!
# The Next Parts
The next step for the ray tracer is to compile it to WebAssembly so it can be demoed here on this very blog. wasm-pack makes this easy, but I will have to do some light refactoring. Correction: previously this paragraph stated that wasm-bindgen did not support generic types, but that’s misleading. u/FruitieX shared a correction: generics are only unsupported in things that sit on the wasm/JS boundary. For example, if a struct or a function are internal to the program and don’t need to be called from JS, they can make full use of generics. Just don’t #[wasm_bindgen] them. Thanks for the correction!

The next thing I’d like to add parallelism, either with threads, SIMD, or both. Rust promises “fearless concurrency”, but I’m still afraid. Or maybe it will be as simple as changing every Rc to Arc. 🌝
Beyond the ray tracer, the next step for me on my Rust journey is to understand lifetime annotations which came up several times during this project. The compiler led me to a solution each time, but I didn’t really understand the meaning of the syntax.
Until next time!