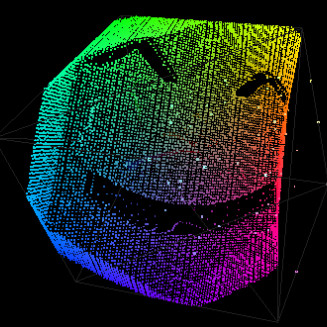
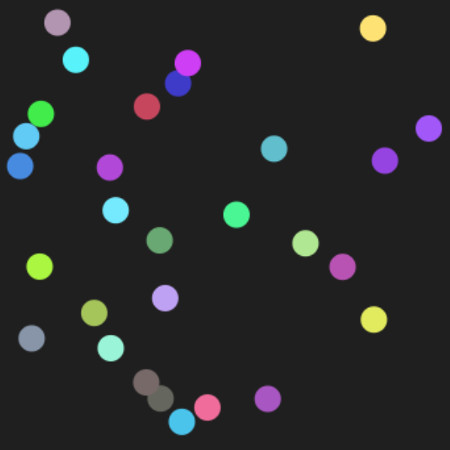
I spent a bit of time this weekend building an RGB color cube for
ColorPal, using Three.js. Drag and drop any image, and you’ll see a
cube with all the pixels of your image mapped into 3D space.
Launch live demo! and view the
code.
Your web browser must support WebGL, which at t…
A few weeks ago, a coworker of mine ran into some font issues. Firefox
doesn’t allow cross-origin requests for web fonts, and he was using a tool
called Font Squirrel to generate fonts, including data URIs.
Embedding a data URI for a font (or image) inside a CSS file is a common
…
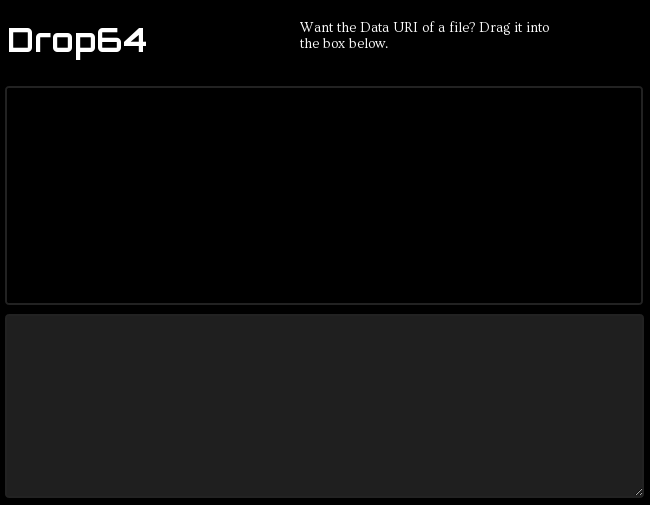
Drop64 is an easy drag-and-drop tool for generating Data URIs from any
file.
Check it out at drop64.com.
Here’s a demo recording of how easy it is.
Some benefits of Data URIs are:
Fewer HTTP requests means faster page loads
avoid cross-origin resource loading issues (fonts in F…
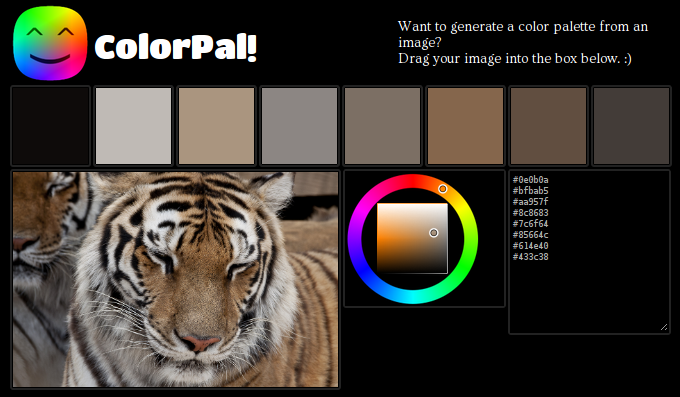
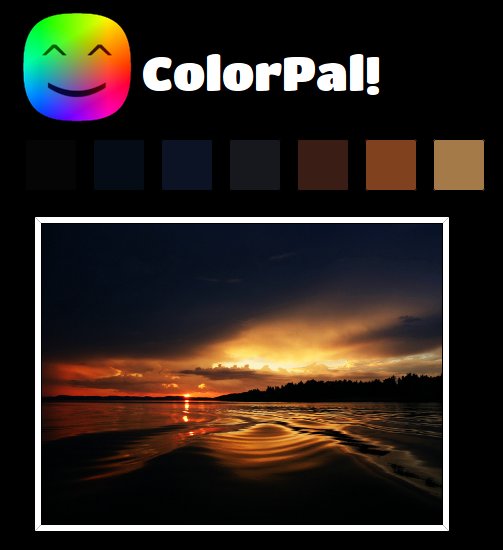
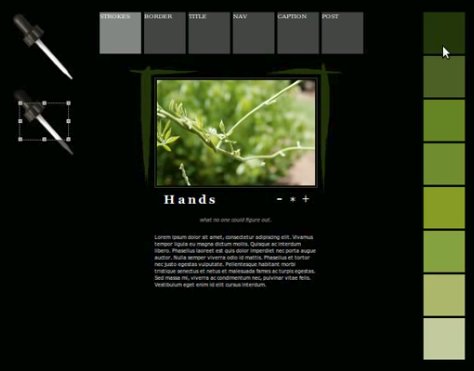
Hi pals.
This is a speedy post about a speedy update I made today to
ColorPal, an HTML5 tool I wrote that automatically
generates color palettes from a photograph.
Previously, ColorPal provided hex codes for each color extracted from the
image. Eight individual <input>s at …
2018-08-29 update: This is an old post about how I created a thin indexed color API in front of HTML5 canvas. It wasn’t very usable or powerful, but it was a fun learning experience. Instead of reading the post, I recommend checking out Mark Ferrari’s breathtaking color cycling a…
What have we here? It’s a limited demonstration of indexed color within the HTML5 canvas element.
.color_palette {
list-style: none;
}
.panel-body {
background-color: #1f1f1f;
}
.palette-panel-body a.btn {
margin: 6px;
}
.color_palette li {
float: left;
disp…
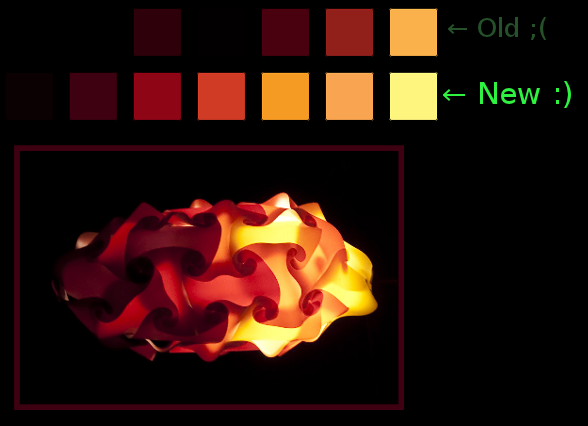
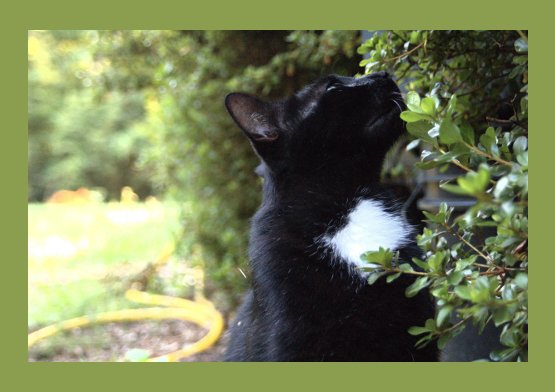
In my last post on the subject, I introduced
ColorPal, my HTML5 color palette generation tool. It didn’t perform well with
certain types of images, so I fixed it. :)
Color palettes will now match the image even better. Especially for images
with infrequent but important colors.…
Introducing ColorPal!
I’ve been toying with color palette generation for years. My photography website has always had some form of dynamic palette, so the theme of each page matches the photo. You can see the current iteration here:
I owe the idea of photo-matching website pale…
This is a slightly upgraded version of the physics demo I showed in my last post.
It is still…
“a buggy, rudimentary, just-for-fun javascript physics simulator.”
This version has:
pre-defined initial states
gravity
friction
It still has the “clinging” bug. I know how to fix it,…
This is the last demo I made using JSImage. I created it some time around 2009-2010. At the time, I had checked out an imaging book from my university’s library at least ten times. Most of the exercises in that book I implemented in Python using PIL, but point operations were si…
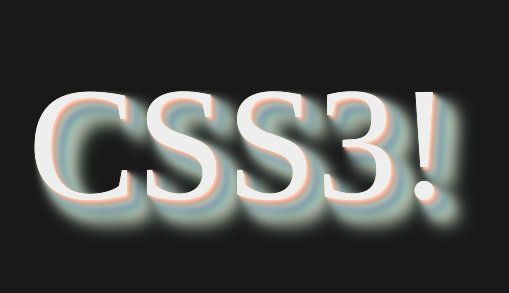
How to ruin a good thing by abusing CSS3 text shadows…
CSS3!
The code:
// Random factors to determine x/y offsets for text shadows and amount of blur
var x_factor = Math.floor(Math.random() * 20) - 10;
var y_factor = Math.floor(Math.random() * 20) - 10;
var blur_factor = Math.fl…
This is Bouncey. It’s a simple physics demo I wrote in early/mid 2011, with some contributions and bugfixes from my good friend Greg Gardner.
The description for bouncey’s github repo is:
“a buggy, rudimentary, just-for-fun javascript physics simulator.”
It covers Newton’s laws o…
For an HCI class project in Fall 2009, I pulled together some of my previous demos to make this integrated tool. It was just a prototype, and I haven’t taken the time to get the code set up and working on this blog. If anyone is interested, I can dig up the code and send it along…
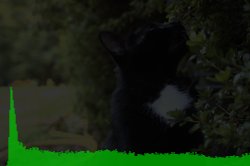
This is yet another demo from around 2009. It’s simple enough. Click a
button, draw an unbinned RGB histogram of the source image.
It’s powered by an early version of an old JS toolkit I wrote called JSImage.
The latest version is available at my JSImage github
repo. Don’t be foo…
This is another demo from 2009-ish. When I started experimenting with canvas, I felt uncomfortable with the 1-dimensionality of CanvasPixelArray. I wrote this script to convert it into a more logical format: X by Y by RGBA. Let me rephrase that. By “more logical”, I mean “more lo…
This is a demo from late 2009. It’s an extension of the single-pixel eyedropper I wrote previously.
It’s powered by an early version of an old JS toolkit I wrote called JSImage. The latest version is available at my JSImage github repo. Don’t be fooled by the 2011 commits, those…
AEJS was an experimental Amiga 500 emulator written in JavaScript. The name
stands for Amiga Emulator JavaScript and is pronounced “aegis”.
My motivation to build AEJS came from these sources:
The HTML5 era introduced new APIs which finally made it possible:
Typed arrays, W…
genlut.py is really filling out. It generates the LUT for all 68k opcodes (68000 only), and I’m about 70% done. 77 down, 34 to go.
The OPCODES dict defines the first two bytes of each opcode, both static bits and operands. The operand strings act as keys into the PATTERNS struct,…
Decoding is easy. Decoding requires a lot of typing. (I am starting to believe this is true of ever aspect of interpreted emulation…)
For the AEJS decoder, I am creating a look-up table with every possible pattern for each instruction. It was my first idea, but I initially discar…
Introducing AEJS, an Amiga emulator written in JavaScript. Wait, wording it like that makes it sound like it’s finished. It isn’t. It won’t be for a long time. AEJS is just a hobby, and will never hold a candle to UAE.
Why the Amiga? Given that this is my first emulator, it would…
JSImage was a basic, buggy, just-for-fun image processing library that I wrote
in 2008/2009 when I first started seriously studying JavaScript.
A stumbled across a book in my university library, and started
implementing the algorithms on the newly available HTML5 canvas element.
…
The unfortunately-named median-cut.js is the library that powers
ColorPal’s palette generation.
I say it’s unfortunately named because it doesn’t implement a pure median-cut
algorithm. It’s identical, except that instead of cutting boxes at their
median, they are instead cut at …